Cross Back Apron Pattern: Free PDF Guide
Discover readily available, free PDF patterns for crafting stylish cross back aprons! Numerous websites offer downloadable guides, simplifying the sewing process for all skill levels.

Explore diverse designs and sizes, ensuring a perfect fit and personalized apron creation – start your project today!
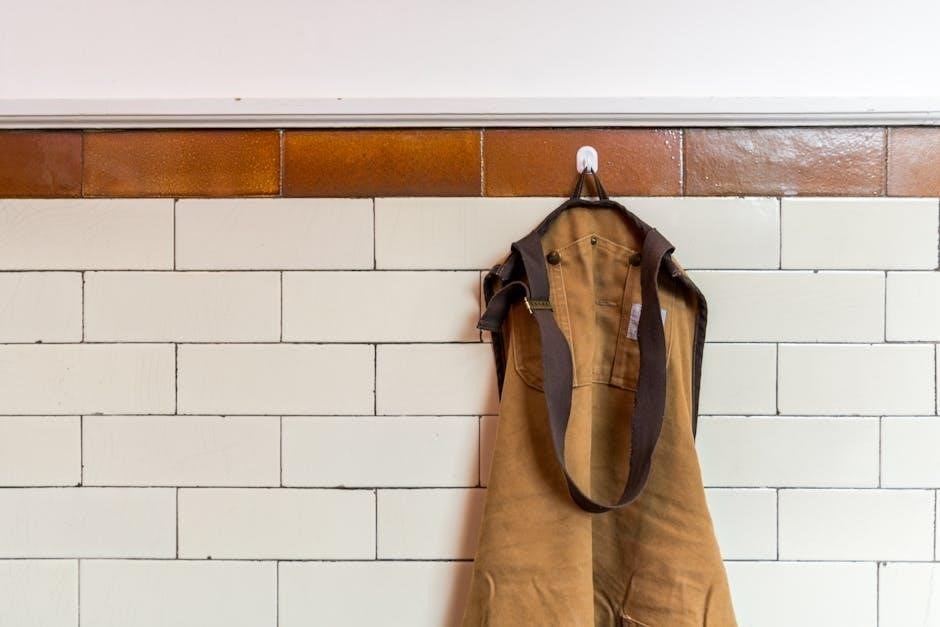
Cross back aprons represent a delightful fusion of practicality and charming aesthetics, quickly gaining popularity among home cooks, artists, and craft enthusiasts. Unlike traditional aprons with waist ties, these feature straps that elegantly cross in the back, distributing weight more evenly and providing superior comfort during extended wear.
Historically, aprons served primarily as protective garments, shielding clothing from dirt and spills. However, the cross back design introduces a stylish element, transforming a functional item into a fashionable accessory. The appeal lies in their flattering silhouette and the reduced strain on the neck and shoulders, making them ideal for lengthy tasks.
Fortunately, creating your own cross back apron is surprisingly accessible, thanks to the wealth of free PDF patterns available online. These patterns cater to various skill levels, from beginners taking their first steps in sewing to experienced crafters seeking a quick and rewarding project. The availability of these resources democratizes apron-making, allowing anyone to enjoy the benefits of a beautifully crafted, personalized apron without a significant financial investment.
Historical Context of Aprons & Cross Back Design
Aprons boast a rich history, tracing back to ancient civilizations where they signified status and profession. Initially, they were simple cloths protecting garments during labor, evolving over centuries into symbols of domesticity and skilled trades. Medieval depictions showcase aprons worn by both men and women, highlighting their universal practicality.
The cross back design, while seemingly modern, echoes historical garment construction techniques focused on weight distribution and comfort. Similar strap arrangements appeared in workwear garments designed for physical tasks, prioritizing ease of movement. However, the current aesthetic appeal of the cross back apron is a relatively recent development, gaining traction in the 20th and 21st centuries.
Interestingly, the surge in popularity coincides with the rise of DIY culture and the accessibility of free PDF patterns. This allows individuals to recreate historical functionality with contemporary style. While pinpointing the exact origin of the modern cross back apron is difficult, its roots lie in a long tradition of practical garment design, now readily achievable through downloadable patterns.
Why Choose a Cross Back Apron? (Benefits & Features)
Cross back aprons offer superior comfort and functionality compared to traditional tie-waist styles. The intersecting straps distribute weight evenly across the shoulders, reducing neck strain – a significant benefit for prolonged wear during cooking, crafting, or gardening. This design also prevents straps from slipping, offering greater freedom of movement.
Furthermore, the aesthetic appeal is undeniable. The cross back creates a flattering silhouette and a modern, stylish look. Free PDF patterns empower you to customize your apron with various fabrics, pockets, and embellishments, reflecting your personal taste.

Beyond style, cross back aprons provide excellent coverage, protecting clothing from spills and messes. They are ideal for both professional and home use, offering a practical and fashionable solution. The availability of free patterns makes this comfortable and chic option accessible to all sewing enthusiasts, regardless of skill level.
Understanding Apron Pattern Terminology

Decoding apron patterns begins with familiarizing yourself with key terms. “Seam allowance” refers to the fabric distance beyond the stitching line – typically 1/2 inch. “Grainline” indicates the direction the fabric pattern should align with the woven threads, impacting drape and stretch.
When using a free PDF cross back apron pattern, you’ll encounter “notches,” small markings guiding fabric alignment during sewing. “Bias” refers to fabric cut diagonally across the grain, offering more stretch. Understanding “darts” – triangular folds sewn to shape the fabric – is crucial for achieving a fitted look.
Pattern pieces are labeled with names like “front,” “back,” and “strap.” “Finished length” denotes the final garment size, while “cutting layout” shows efficient fabric placement. Free patterns often include a glossary; don’t hesitate to consult it! Mastering these terms ensures accurate cutting and a successful sewing experience.
Materials Needed for a Cross Back Apron
Creating a cross back apron requires selecting appropriate fabrics. Durable options include cotton canvas, denim, linen, or twill – ideal for resisting wear and tear. The amount needed varies based on your chosen free PDF pattern and size, typically ranging from 1.5 to 2 yards of 44/45-inch wide fabric.
Essential supplies include matching thread, bias tape for finishing raw edges, and interfacing for added structure, particularly for the straps. Consider purchasing pre-made twill tape for the ties if you prefer a simpler approach.
Optional materials for customization include decorative fabric for pockets, rickrack trim, or embroidery floss. When utilizing a free pattern, double-check the material list to ensure you have everything before starting. Having quality materials elevates the final product and ensures longevity.
Tools Required for Sewing a Cross Back Apron
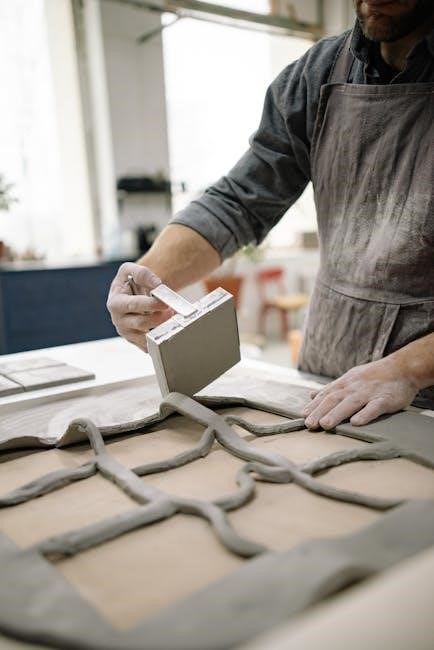
Successfully constructing a cross back apron, even with a free PDF pattern, necessitates specific sewing tools. A sewing machine is fundamental, ideally with adjustable stitch lengths and widths. Sharp fabric scissors are crucial for precise cutting, while rotary cutters and mats offer efficiency, especially for straight lines.
Essential accessories include pins for holding fabric layers together, a seam ripper for correcting mistakes, and a measuring tape for accurate measurements. A clear ruler aids in drawing straight lines and ensuring consistent seam allowances.
Helpful tools include an iron and ironing board for pressing seams, a point turner for creating crisp corners, and a fabric marker for transferring pattern markings. Utilizing a free pattern often requires careful marking, so a good marker is vital. These tools streamline the process and contribute to a professional finish.
Free PDF Pattern Sources: Top Websites
Numerous online platforms offer free PDF patterns for cross back aprons, catering to diverse skill levels and aesthetic preferences. Sewing.com frequently features beginner-friendly apron patterns, including cross back styles, with clear instructions. AllFreeSewing.com compiles patterns from various sources, providing a wide selection to explore.
Mood Fabrics, known for its high-quality fabrics, also provides free sewing patterns, occasionally including apron designs. So Sew Easy offers a curated collection of free patterns, often with detailed tutorials and helpful tips. Pinterest serves as a valuable resource, linking to numerous independent designers and blogs offering free cross back apron PDFs;
Remember to always check the pattern’s requirements and skill level before downloading. These websites provide a fantastic starting point for your apron-making journey!
Pattern Selection: Choosing the Right Size & Style
Selecting the perfect pattern is crucial for a well-fitting and aesthetically pleasing cross back apron. Beginners should opt for simpler patterns with fewer pieces and detailed instructions. Consider your body type; patterns often include size charts – measure your bust, waist, and hip to ensure an accurate fit.
Style preferences also play a key role. Do you prefer a full apron, a half apron, or one with pockets? Cross back strap length is vital for comfort; adjustable straps offer versatility. Review pattern reviews from other sewists to gauge difficulty and potential issues.
Download the PDF and print the pattern pieces at 100% scale to maintain accuracy. Carefully examine the pattern layout before cutting your fabric. A well-chosen pattern sets the foundation for a successful sewing project!
Step-by-Step Sewing Instructions: Cutting the Fabric
Begin by preparing your chosen fabric – pre-wash and iron it to prevent shrinkage and ensure accurate cutting. Lay the fabric flat on a large, clean surface. Refer to the pattern’s layout guide to efficiently arrange the pattern pieces, maximizing fabric usage.

Pin the pattern pieces securely to the fabric, ensuring the grainline arrow aligns with the fabric’s lengthwise grain. Use sharp fabric scissors or a rotary cutter to carefully cut around each pattern piece, adding a seam allowance (typically ½ inch) unless otherwise specified.
Accurately transfer any markings – darts, buttonholes, or pocket placements – from the pattern to the fabric using tailor’s chalk or a fabric marker. Double-check all cut pieces against the pattern to confirm you have everything needed before proceeding!
Step-by-Step Sewing Instructions: Assembling the Apron Body
Begin by sewing the apron’s side seams, right sides together, using a straight stitch and your chosen seam allowance. Press the seams open for a clean finish. If your pattern includes darts, stitch them now, pressing towards the center of the apron.
Next, attach any pockets according to the pattern instructions. Pin them carefully, ensuring even placement, and stitch securely. Reinforce the pocket corners with backstitching for durability. Now, construct the apron’s waistline – often involving folding and pressing the fabric to create a casing or finished edge.
Stitch the waistline casing, leaving an opening for inserting elastic or a tie. Finally, press the entire apron body thoroughly, shaping it and preparing it for strap attachment. A well-assembled body is crucial for a professional look!
Step-by-Step Sewing Instructions: Creating the Cross Back Straps
Start by cutting the fabric strips for your cross back straps, following the pattern’s specified length and width. Fold each strip lengthwise, right sides together, and stitch along the long edge, leaving one end open. This creates a tube.
Turn the tubes right side out using a safety pin or turning tool. Press the straps flat, ensuring a crisp, clean finish. Topstitch along both long edges of each strap for added durability and a professional appearance. Consider adding interfacing to the straps for extra support, especially with heavier fabrics.

If your pattern calls for adjustable buckles, attach them to the straps now, following the buckle manufacturer’s instructions. Ensure the buckles are securely fastened before proceeding. Properly constructed straps are vital for comfort and a secure fit!
Attaching the Straps & Finishing Touches
Position the cross back straps onto the apron’s back panel, ensuring even spacing and alignment with the pattern markings. Pin securely, then stitch the straps firmly in place, reinforcing the stitching at stress points. Backstitch at the beginning and end of each seam for added durability.
Next, address the waist ties. Attach these to the sides of the apron, again pinning and then stitching securely. Consider a decorative stitch for a unique touch. Trim any excess fabric and finish raw edges with a zig-zag stitch or serger to prevent fraying.
Finally, press the entire apron for a polished look. Add any desired embellishments like pockets, ruffles, or embroidery. Inspect all seams and reinforce as needed. Your handmade cross back apron is now complete!
Adjusting the Pattern for Different Body Types
For a longer torso, extend the apron’s body length at the cutting stage, adding inches to the pattern piece. Conversely, shorten the body for a petite frame. Adjust strap length to ensure comfortable shoulder placement – longer straps for broader shoulders, shorter for narrower ones.
To accommodate a fuller bust, slightly widen the apron’s front panels. Gradually increase the width from the armholes downwards. Consider a deeper neckline for comfort. For smaller busts, reduce the width accordingly.
Always test the fit with a muslin mockup before cutting your final fabric. Pin and adjust the muslin until it fits perfectly. Transfer these adjustments to your pattern pieces for a customized fit. Remember, a well-fitted apron enhances both comfort and style!
Troubleshooting Common Sewing Issues
Uneven hems? Use a walking foot for consistent fabric feed. Strap twisting? Interface the straps with a firm stabilizer to prevent stretching; Difficulty attaching straps? Pin securely and use a longer stitch length for easier maneuvering.
Fabric puckering? Reduce presser foot pressure and use a ballpoint needle for knit fabrics. Seams bunching? Ensure consistent seam allowances and clip curves before turning. Thread breaking? Re-thread your machine, check the needle for damage, and use quality thread.
If the apron gapes, adjust the side seams for a snugger fit. Always test stitch on a scrap fabric before sewing the final project. Don’t rush! Slow and steady sewing yields the best results. Remember patience is key!
Fabric Choices: Best Materials for Durability & Style
For durability, consider denim, canvas, or duck cloth – these withstand frequent washing and heavy use. Linen offers a classic, breathable option, perfect for warmer climates, though it wrinkles easily. Cotton twill provides a balance of durability and comfort, ideal for everyday wear.
For style, explore patterned cottons, florals, or even vintage fabrics. Oilcloth is a practical choice for messy tasks, being water-resistant and easy to wipe clean. Consider weight; lighter fabrics drape beautifully, while heavier fabrics offer more structure.
Pre-wash all fabrics to prevent shrinkage after sewing. Don’t be afraid to mix and match fabrics for a unique look! Remember the apron’s intended use when selecting materials – a baking apron needs different properties than a gardening apron.
Variations & Customization Ideas (Pockets, Ruffles, etc.)
Elevate your apron with practical and decorative additions! Pockets are essential – add patch pockets, kangaroo pockets, or even split pockets for various tools. Ruffles along the hem or neckline introduce a charming, feminine touch.
Consider contrasting binding for a pop of color and a professional finish. Embroidery or appliqué can personalize your apron with unique designs. Experiment with different strap styles – wider straps offer more comfort, while thinner straps create a sleeker look.

Add a loop for hanging or a D-ring for attaching tools. Play with fabric combinations – use a contrasting fabric for the bib or straps. Don’t be afraid to get creative and make the apron truly your own!

Caring for Your Handmade Cross Back Apron
Preserve the beauty and functionality of your lovingly crafted apron with proper care! Always check the fabric care label – most cotton aprons are machine washable in cold water. Avoid harsh detergents and bleach, which can fade colors and weaken fibers.
Tumble dry on low heat or, ideally, hang to dry to prevent shrinkage and maintain shape. Iron on a low setting if needed, using a pressing cloth to protect delicate fabrics or embellishments. Address stains promptly – pre-treat with a stain remover before washing.
For aprons with intricate details like ruffles or embroidery, hand washing is recommended. Store your apron neatly folded or hung to prevent wrinkles and creases. With a little attention, your apron will last for years!
Resources for Further Learning & Inspiration
Expand your sewing skills and discover endless apron design possibilities! Explore online sewing communities like those found on Reddit (r/sewing) and Facebook groups dedicated to apron making for pattern sharing and advice.
YouTube channels such as Professor Pincushion and Made to Sew offer excellent tutorials on apron construction and sewing techniques. Websites like Mood Fabrics provide fabric guides and inspiration. Pinterest is a treasure trove of apron ideas and free patterns – search “cross back apron” for a visual feast!
Consider taking an online sewing class on platforms like Skillshare or Creativebug to refine your skills. Don’t hesitate to experiment with different fabrics, embellishments, and pattern adjustments to create a truly unique apron!