This manual provides a comprehensive guide for installing and maintaining the Honeywell 4000 series thermostats, ensuring proper setup and optimal performance of your HVAC system.
Overview of the Honeywell 4000 Series Thermostats
The Honeywell 4000 series thermostats are programmable digital devices designed for efficient temperature control in residential and light commercial settings. Models like the TH4110D and TH4210D cater to different HVAC configurations, including 1 Heat/1 Cool and 2 Heat/1 Cool heat pump systems. These thermostats are pre-programmed for ease of use, requiring only the setup of time and day. Advanced features include an optimized deadband algorithm, which enhances system efficiency. The series is compatible with various HVAC systems and integrates seamlessly with other Honeywell products. Their user-friendly interface and robust functionality make them a reliable choice for maintaining consistent comfort while reducing energy consumption. Proper installation ensures optimal performance and compliance with safety standards.

System Requirements and Compatibility
The Honeywell 4000 series thermostats are compatible with various HVAC systems, including 1 Heat/1 Cool and 2 Heat/1 Cool heat pump configurations, ensuring versatile installation options.
Supported HVAC Systems for Honeywell 4000
The Honeywell 4000 series thermostats are designed to work seamlessly with a variety of HVAC systems. They support configurations such as 1 Heat/1 Cool systems, ideal for basic heating and cooling needs, and 2 Heat/1 Cool heat pump systems, which are suitable for more complex setups. These thermostats are also compatible with dual-fuel systems, combining gas heating with electric cooling for efficient temperature control. Additionally, they can integrate with multi-stage heating and cooling systems, allowing for precise temperature regulation. This versatility ensures that the Honeywell 4000 series can meet the demands of different home environments, providing reliable and efficient performance across various HVAC configurations.
Compatibility with Other Honeywell Products
The Honeywell 4000 series thermostats are designed to integrate seamlessly with other Honeywell products, enhancing your home automation experience. They are compatible with Honeywell’s range of smart home devices, including security systems, door controls, and energy management solutions. Additionally, these thermostats work in conjunction with Honeywell’s air quality sensors and humidifiers, allowing for a holistic approach to indoor climate control. Compatibility with Honeywell’s wireless accessories ensures a connected and efficient home environment. This integration capability makes the Honeywell 4000 series a versatile choice for modern smart homes, enabling users to manage multiple systems through a single interface for convenience and energy efficiency.
Installation Process
The Honeywell 4000 installation involves preparing tools, following wiring diagrams, and mounting the wallplate. Set the time and day for a seamless, pre-programmed experience.
Preparation and Tools Needed for Installation
Before starting, ensure you have all necessary tools and materials. A screwdriver, wire strippers, pliers, and a voltage tester are essential for safe and accurate connections. Disconnect the power supply to your HVAC system to avoid electrical hazards. Gather the thermostat, wallplate, sensors, and mounting hardware. Refer to the wiring diagram provided in the manual to understand the connections. Ensure the area is clear and well-lit for ease of work. Familiarize yourself with local electrical codes and regulations. If unsure, consult a licensed professional. Proper preparation ensures a smooth installation process and optimal performance of your Honeywell 4000 thermostat. Always follow safety guidelines to prevent accidents or system damage.
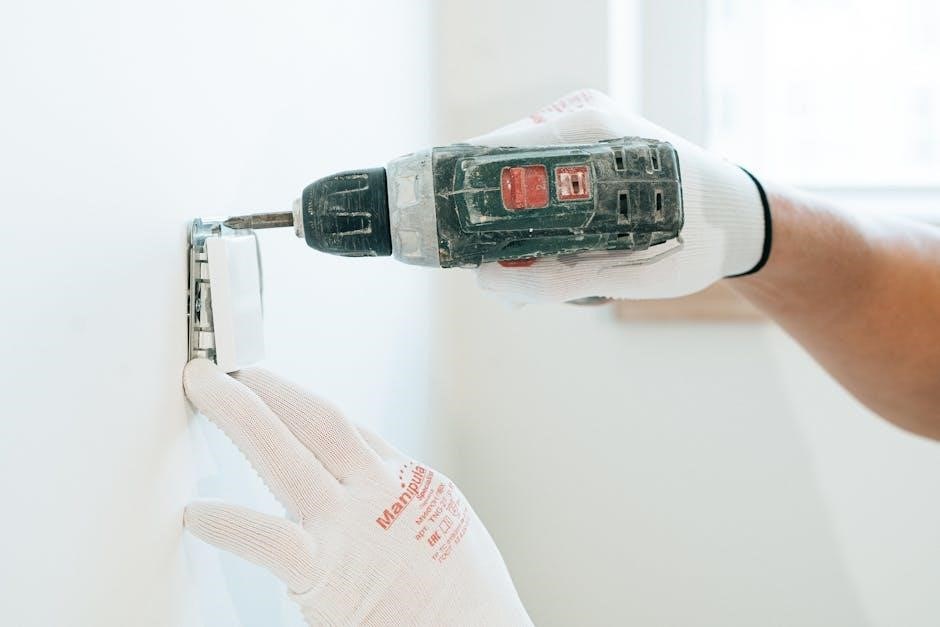
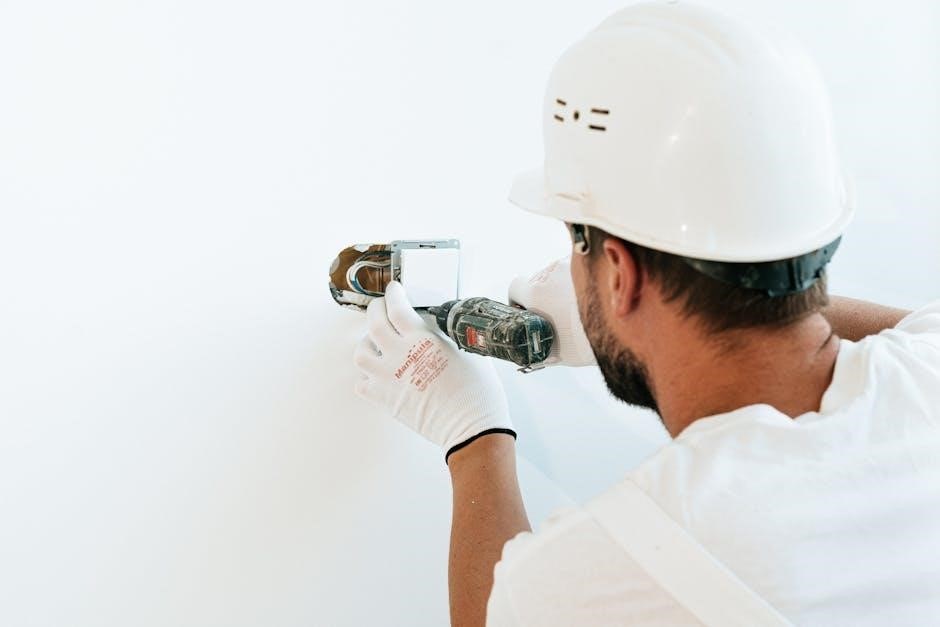
Wallplate Installation and Mounting Instructions
Begin by removing the wallplate from the thermostat. Gently pull it away from the device to access the wiring. Next, locate the mounting area on the wall, ensuring it is level and securely fastened. Use the provided screws to attach the wallplate to the wall, making sure it is tightly fixed. Once mounted, carefully pull the wires through the wire hole in the wallplate. Align the thermostat with the wallplate and secure it firmly. Ensure all connections are tight and properly seated. Double-check the alignment to prevent any installation issues. This step ensures a stable and professional installation of your Honeywell 4000 thermostat. Follow these instructions carefully to complete the wallplate installation successfully.
Wiring Diagrams and Electrical Connections
Refer to the wiring diagrams provided in the manual for specific models like MF4000A and MF4000P. Ensure all connections comply with local and national electrical codes. Verify that all valves are correctly earthed before proceeding. Tighten all wire connections securely to avoid loose terminals, which can cause malfunctions. For standalone applications using the MT4000, use proper strain-relief methods to prevent wire damage. Follow the manual’s guidelines for line voltage requirements, such as 220-240V for certain models. Double-check the wiring configuration to match your HVAC system type, whether it’s a 1 Heat/1 Cool system or a heat pump setup. If unsure, consult the manual or a licensed electrician to ensure safe and correct electrical connections. Proper wiring is crucial for optimal performance and safety of your Honeywell 4000 thermostat.
Sensor Installation and Placement Guidelines
Mount the sensor in a location where it cannot be touched or interfered with, ideally on an inside wall at a height of approximately 52 inches (1.32 meters). Ensure the sensor is protected from direct sunlight, drafts, and extreme temperatures to maintain accurate readings. Avoid placing the sensor near heating vents, radiators, or air conditioning units. For standalone applications, use proper strain-relief methods to secure wires and prevent damage. Follow the manufacturer’s guidelines for wiring connections, ensuring compliance with local electrical codes. After installation, verify that all connections are secure and functioning correctly. Refer to the wiring diagrams in the manual for specific configurations, such as those for MF4000A or MF4000P models, to ensure proper setup and optimal performance of your Honeywell 4000 thermostat.
Setup and Configuration
This section guides you through setting up your Honeywell 4000 thermostat, including time and day configuration, understanding pre-programmed settings, and accessing advanced options for tailored control.
Time and Day Configuration
To ensure your Honeywell 4000 thermostat operates efficiently, accurately set the time and day. Use the touchscreen interface to navigate to the clock settings. Select the current time and date using the arrow keys, then confirm to save. Proper time and day configuration is essential for scheduling and maintaining consistent temperatures. If your system is connected to a power source, the time will update automatically. For battery-powered models, manual adjustment may be required. Ensure accuracy to avoid issues with programmable settings. This step is foundational for all advanced features and energy-saving functions. Always refer to the display for confirmation after setting. Correct time and date ensure smooth operation and optimal performance of your HVAC system.
Understanding Pre-Programmed Settings
Your Honeywell 4000 thermostat comes with pre-programmed settings designed to optimize comfort and energy efficiency. These settings include default temperature schedules and energy-saving parameters. Upon initial setup, the thermostat is ready to use with minimal adjustments required. Pre-programmed settings simplify the user experience, ensuring consistent performance without extensive customization. Key features include automatic temperature adjustments based on time of day and occupancy patterns. Users can rely on these settings for reliable operation, though they can be modified to suit specific preferences. The pre-programmed settings are engineered to balance comfort and energy savings, making the thermostat user-friendly and efficient right out of the box. This eliminates the need for complex configurations, allowing you to enjoy a seamless experience from installation.
Advanced Setup Options and Deadband Configuration
The Honeywell 4000 thermostat offers advanced setup options for tailored comfort and efficiency. One key feature is the deadband configuration, which determines the temperature range between heating and cooling cycles. Unlike earlier models, the Honeywell 4000 uses an advanced algorithm that automatically sets the deadband to 0°F, eliminating manual adjustments. This innovative approach minimizes temperature swings and optimizes system performance. Advanced setup options also include custom scheduling, temperature limits, and energy-saving modes. These features allow users to fine-tune their settings for specific needs. The fixed deadband ensures consistent comfort while reducing energy consumption. For professionals, Installer Setup (ISU) parameters provide deeper customization to match the thermostat with various HVAC systems. This blend of simplicity and advanced control makes the Honeywell 4000 versatile for both homeowners and installers, ensuring optimal performance in any setting.
Maintenance and Troubleshooting

Regular maintenance ensures optimal performance of your Honeywell 4000 thermostat. Clean the device, check battery levels, and verify wiring connections. Address common issues like incorrect temperature readings or connectivity problems promptly. Resetting the system or updating software may resolve operational hiccups. For persistent issues, refer to the troubleshooting guide or contact Honeywell support for assistance. Proper upkeep extends the lifespan and reliability of your thermostat, ensuring consistent climate control and energy efficiency. Always follow safety guidelines when performing maintenance tasks. If unsure, consult the manual or seek professional help to avoid system damage. Regular checks prevent unexpected malfunctions, keeping your HVAC system running smoothly year-round.
Battery Replacement and Power Management
The Honeywell 4000 thermostat may require battery replacement to ensure continuous operation. Install fresh batteries when the “REPLACE BATT” warning flashes, typically two months before depletion. For models using AC power, batteries serve as a backup. To replace batteries, remove the wallplate, take out the old batteries, and insert new ones following the polarity indicators. Replace the wallplate securely after installation. Proper battery management prevents system downtime and maintains settings. Dispose of old batteries responsibly. If using AC power, ensure wiring is correct to avoid reliance on batteries. Refer to the owner’s manual for specific model instructions. Regular checks of battery levels and power connections are essential for reliable performance. This ensures your thermostat operates smoothly, maintaining consistent climate control and energy efficiency. Always follow safety guidelines during replacement to avoid damage or malfunction.
Software Updates and System Maintenance
Regular software updates are crucial for optimal performance of the Honeywell 4000 thermostat. Check for updates via the Honeywell website or through the thermostat’s interface. Updates enhance functionality and fix issues. Perform updates during low-demand periods to avoid interruptions. After updating, restart the system to apply changes. For maintenance, ensure the thermostat is clean and free from dust. Verify sensor accuracy by checking temperature readings against a reliable source. Refer to the user guide for specific maintenance schedules. Visit yourhome.honeywell.com for detailed instructions and support. Proper maintenance ensures reliable operation and extends the lifespan of your thermostat. Always follow Honeywell’s guidelines for software updates and system care to maintain efficiency and performance;
Troubleshooting Common Issues
Common issues with the Honeywell 4000 thermostat include incorrect temperature readings, unresponsive displays, and connectivity problems. Check sensor placement and ensure they are not obstructed. Verify wiring connections are secure and comply with local codes. If the display is unresponsive, reset the thermostat by removing batteries or power cycling. For connectivity issues, restart your router and thermostat. Low battery warnings should prompt immediate replacement to avoid system shutdowns. Refer to the user guide for detailed troubleshooting steps. Visit yourhome.honeywell.com for additional support. Regular maintenance, such as cleaning the thermostat and updating software, can prevent many common issues. Always follow Honeywell’s troubleshooting guidelines to resolve problems efficiently and ensure reliable system operation.